


AquaNurture 9 Function Hand-held showers ABS
The water we encounter daily is not always as pure as it should be.
Hard water, chlorine, and heavy metals silently affect our skin and hair, leading to issues we often overlook.
Common After-Shower Problems
Hair Troubles:
- Tangled and frizzy strands
- Dry, brittle texture
- Dull appearance lacking shine
- Difficult to manage, even with conditioner
Skin Reactions:
- Redness and itching after shower
- Dry patches, flakiness, or peeling
- Tightness and discomfort
- Increased sensitivity, especially on face and body
We believe that water should nourish, not harm.
That’s why we founded AquaNurture—to develop advanced shower filtration technology that removes chlorine, chloramines, heavy metals, and other harmful impurities from shower water, restoring it to its most natural, skin-loving state.
By transforming your daily shower into a clean, revitalizing ritual, AquaNurture helps protect your skin barrier, revives your scalp health, and brings your hair’s natural shine back—one shower at a time.
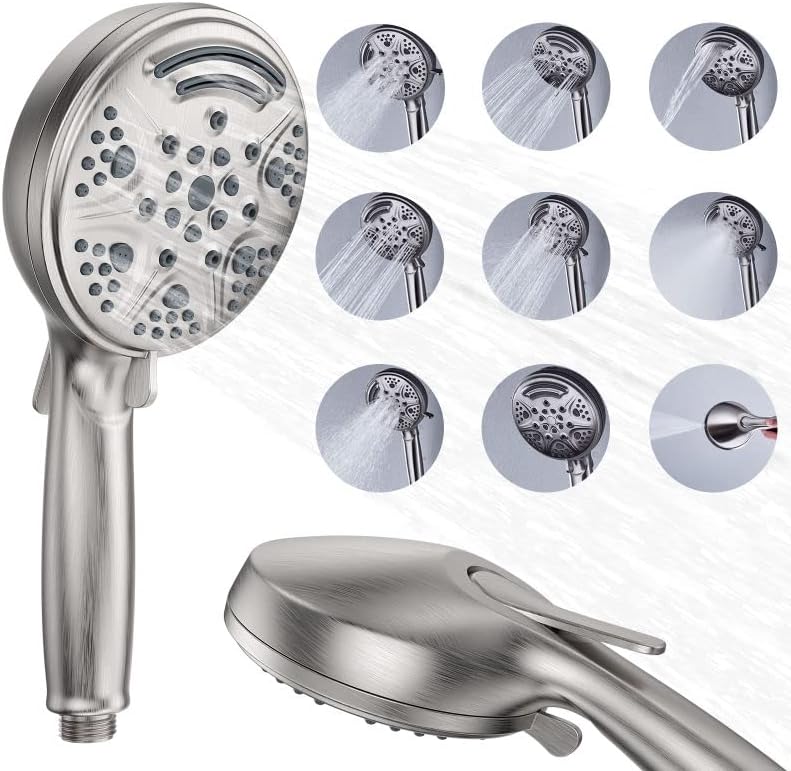
AquaNurture 9 Function Hand Showers Head ABS is a universal hand shower head mount made from high quality ABS, which makes it a lightweight, but durable model.
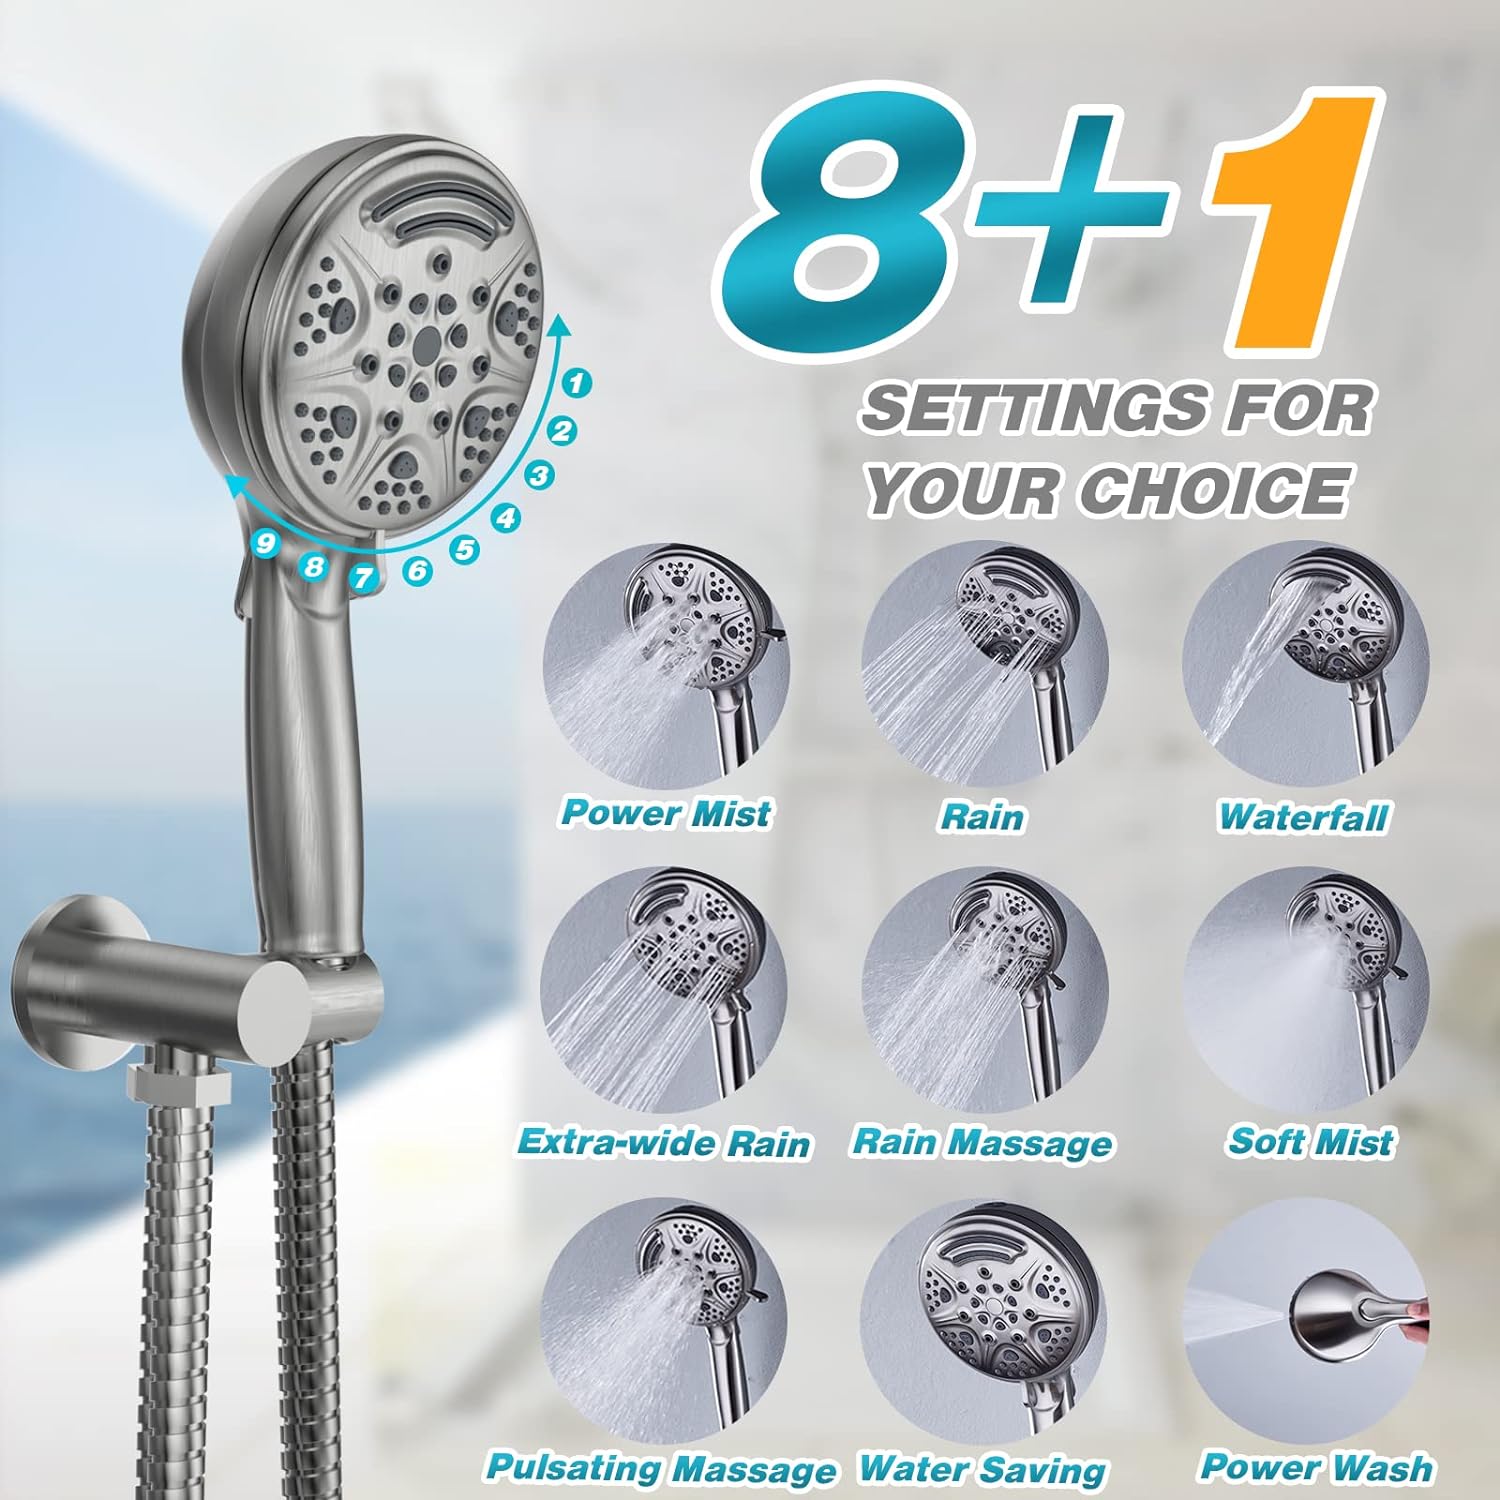
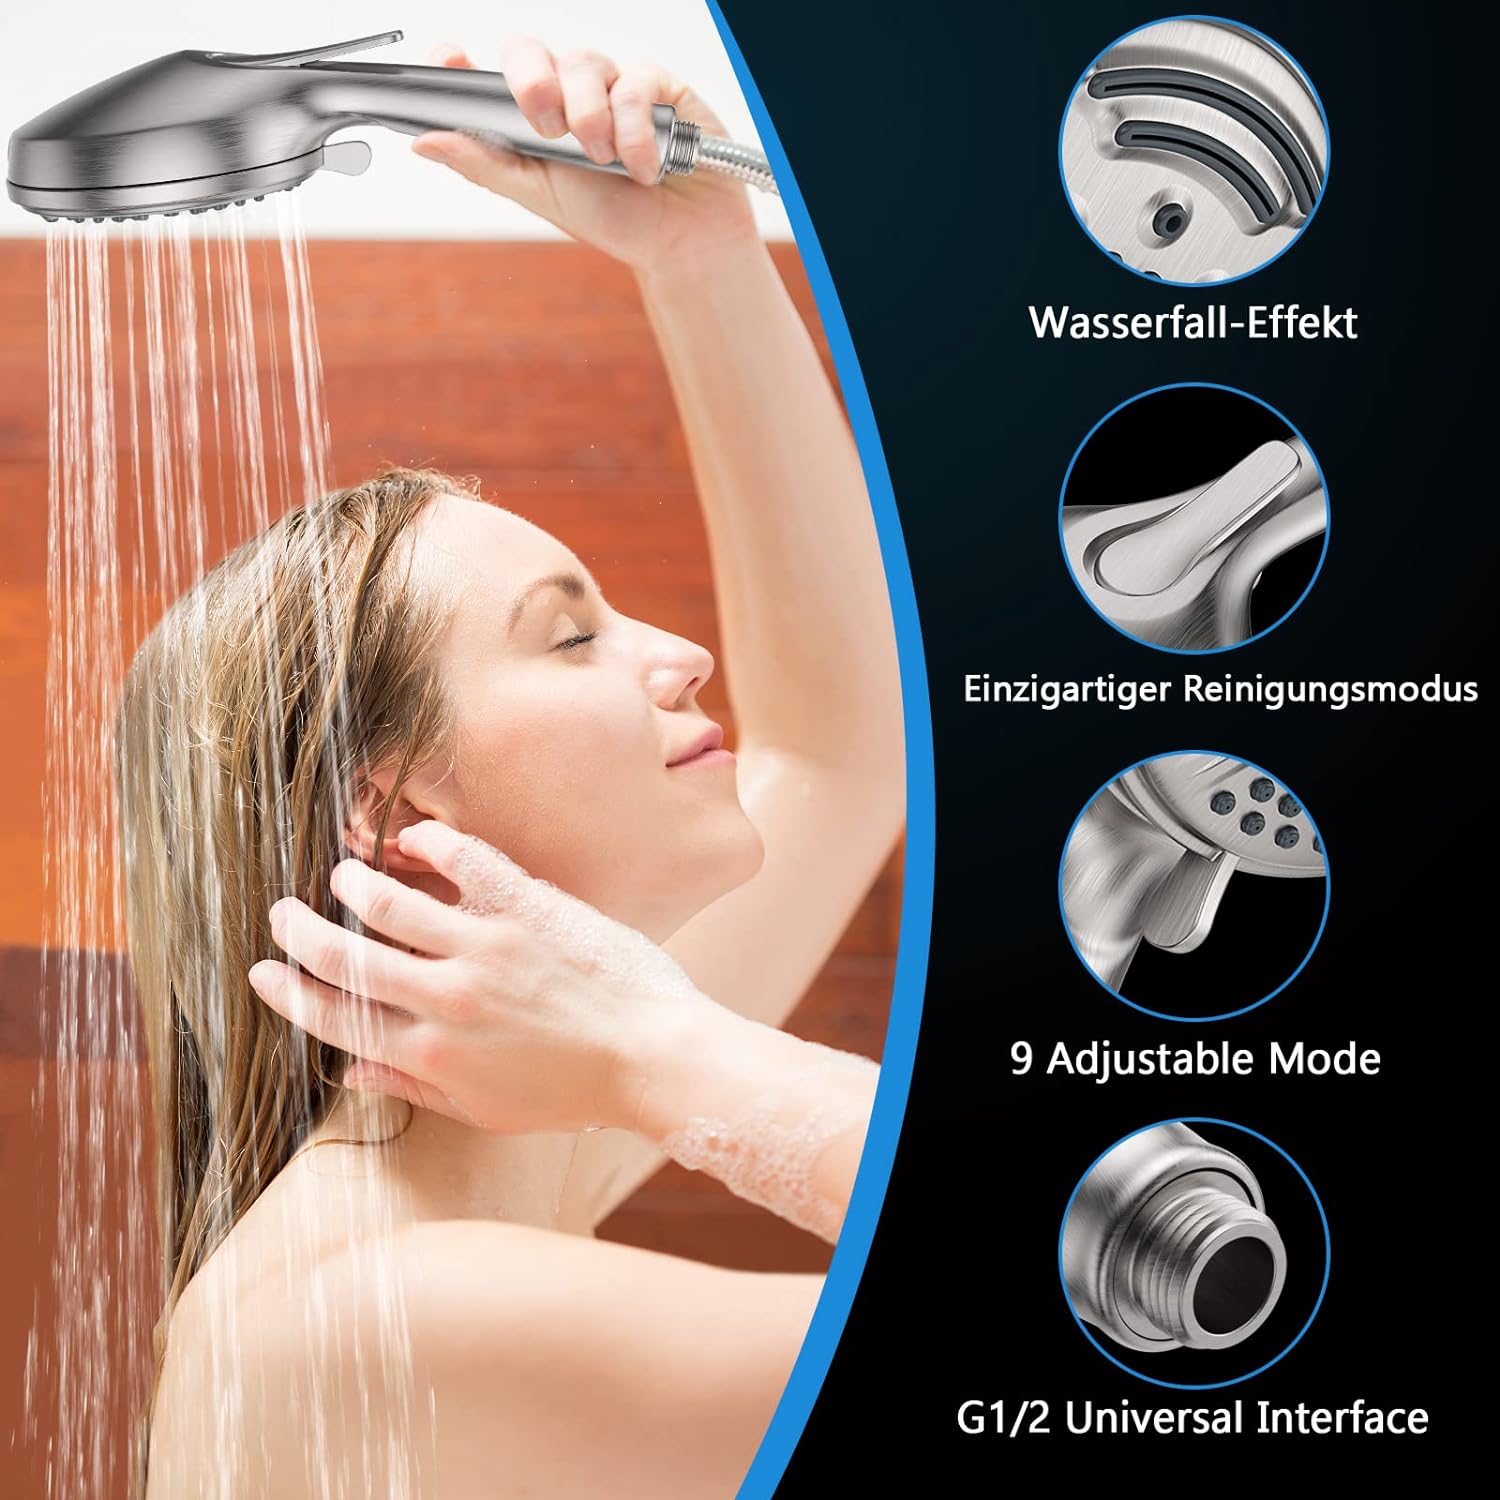
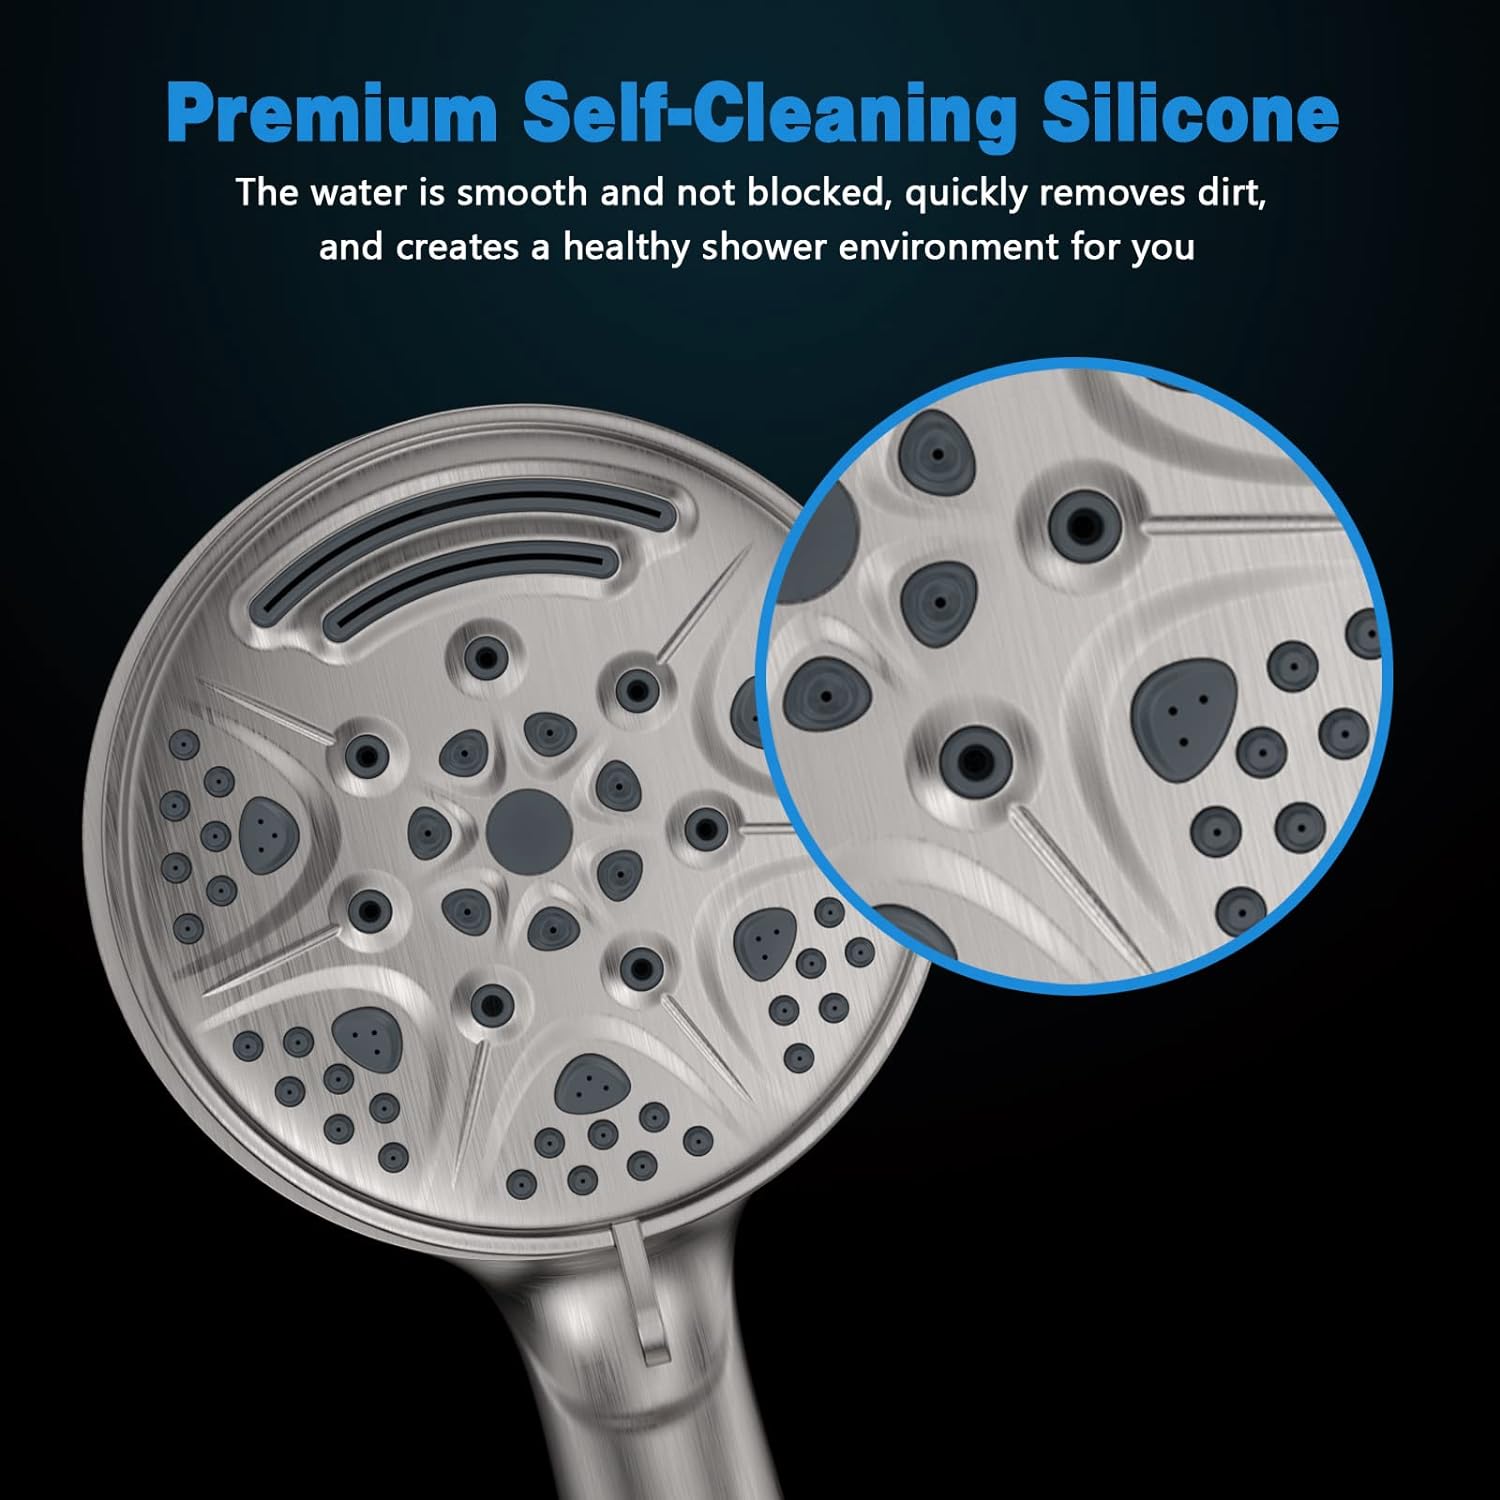
The finish protect your high pressure shower head from corrosion and modern round style will make your bathroom more beautiful. Just press the button, you can very convenient to switch three modes between rain, spring, rain and spring. The design of kwik clean spray plate, hand held shower head is very easy to remove surface stains and deposits.
No plumber required! Install this 9 functions shower head in minutes with a simple connection. Universal G1 / 2 "thread fits any standard shower hose, arm, extension or filter .
Installation Steps:
Step 1: Glue the shower arm threads
Step 2: Screw the bracket onto the shower arm
Step 3: Connect the hose to the bracket and shower head Insert the washer into the flare nut of the hose and secure it to the shower head. Insert another washer into the hex nut of the tube and secure it to the bracket.
Step 4: Verify the installation. Make sure all coupling nuts are tight, hold the entire bracket by hand and rotate the ball joint to set the desired angle. Then open the main water supply and check for leaks.